
I’ve been planning to write on this for awhile, but with The Rise of Covid, more musicians have been asking for this kind of information. Musicians are seeing the need to produce decent recordings on their own, often from home.
While a discussion of recording equipment will need to be a separate post, here I want to give some very basic tips for editing and tweaking audio. I’m sure we’ve all heard a lot of bad live recordings. You can make them a little better by doing the following. Screenshots are from Audacity, a free, cross-platform audio editing app.
Fade in/out
One of the simplest things you can do is fade your audio in and out. For live recordings, there will be some ambient and audience noise. If your recording starts without a fade, not only might you have the jolt of that noise, but you might have a little pop as the audio jumps immediately from 0 to on.
I would advocate removing applause if you can. But if you keep it, you can fade it out over 3-4 seconds.
Volume adjustment
Classical music has a wide dynamic range, and to prevent distortion on the loud moments, engineers often record a little on the soft side. Since most people listen to clips on their computers or phones, you’ll need to boost the volume a bit so they can hear it.
In Audacity, you can choose “Amplify” and then amplify so the highest peak is just under “0.” I’d recommend -0.1 to -0.5.

When I produce live recordings, I’ll make some minor adjustments as I go–such as bringing up the soft passages about 3 decibels. While this does reduce the dynamic range, which is heretical to some classical musicians, it improves the listener experience. You don’t want someone to be constantly shifting their volume. 3 or even 6 decibels on soft passages can be subtle enough that it doesn’t sound artificially boosted. Just make sure to gradually move the volume down as the music itself increases dynamics.
EQ
Equalization is a process of cutting or boosting areas of the frequency range. If you’ve played around with the “high” and “bass” settings of your car stereo, you’ve been equalizing.

One of the easiest ways you can help your live recording is filtering out very low frequencies. Humans can’t hear below 20 Hz, and most sound below 30 Hz is likely HVAC noise. Gradually roll it off below about 60 Hz and you’ll be amazed at how much “cleaner” it sounds.
Use these tips with extreme caution. If you want your recording to sound “brighter,” you can try a subtle boost of about 2 dB for 10kHz and above. This may overemphasize some background noise. Sometimes boosting around 3-5kHz can make vocals and melodic instruments sound a little more present. Do some experimenting and see if you like it. But don’t go overboard–entire book chapters have been written about equalization for different instruments!
Compression
Compression is a process of automatically reducing the dynamic range of a recording. If a recording goes above a certain threshold, the compressor knocks it down a certain percentage. This effect takes some practice, and is used extremely subtly in classical music (it’s used all the time in popular music).
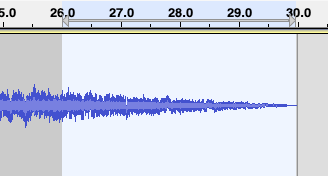
You might go for compression if you have percussion or percussive effects in your recording. If you look at a waveform, you might see some spikes on snare hits, for example. While you can do manual volume adjustments, sometimes all you need is a compressor with a high threshold to reduce those peaks just a little.
This helps you raise the volume of the entire recording. Sometimes percussive transients are 6 or more dB above the rest of the recording, so the whole thing sounds fairly soft. Knocking those transients down 6 dB means the whole thing can be 6 dB louder.
Below is a short passage, first with the “raw” recording, then a very compressed version, then a version with “make-up gain” (volume adjustment). Take a listen to both versions–the compressed is certainly louder, but I took it too far; you don’t actually want to hear that it’s compressed.


Noise reduction
Noise reduction is pretty complicated and the algorithm in Audacity isn’t particularly good. Basically, it compares a short sample of background noise with a recording and tries to attenuate the frequencies in the background noise sample. You can run into trouble very quickly though, since you might cut out frequencies of the instruments, or introduce a weird warbly effect. If you’re going to do this, buy a commercial plug-in like X-Noise from Waves, and listen very carefully. If you’re subtle about it, you can make things sound a little cleaner, especially in combination with judicious EQ.
File types
You’ve probably run across a number of different file types for music–mp3, m4a, wav, aiff among the most popular. They are different.
WAV and AIFF are “uncompressed audio.” These will be the best quality you can find. They are also much larger files. Mp3 and M4a are “compressed audio.” More lIke noise reduction than dynamic compression, these files have an algorithm that finds frequencies that can be eliminated. At any given moment, you might not be using part of the spectrum, so that is cut out to save space. Mp3s in the 90s sounded terrible because they cut out too much, sometimes overemphasizing the remaining frequencies. While mp3s sound better now, look to encode at a high bit rate (320 or 256) for a better sound.
Where to post your music
There are many places to post your music online. On your own site, you can use a plug-in to display a track to play, like this:
I would recommend mp3s for your site (but keep .wavs or .aiffs if someone asks). Since mp3s are smaller, people can more easily stream them.
You can also post tracks to other websites. Generally, the sites will process your tracks to lower quality so that people can more easily stream them. I would think of the sites in this way:
- SoundCloud – free (to a point), lower quality, use in place of a website or to more easily share on social media
- YouTube – free, ok quality, will need to convert to a video (perhaps a score video)?
- Bandcamp – you have good recordings that you want to release as “albums” for pay
- Spotify, Amazon, etc. — you’ll need to work with a distribution service like TuneCore or DistroKid to get your music placed on these platforms. It’s difficult to have things removed later, so I’d wait until you have a solid album ready.

